Good shelter is very important for surviving almost any condition. Because of that, if you want to conquer the wilderness, you’ll need a lot of knowledge in types of shelter for survival. The more knowledge and ability you have, the more confident you are to stay in the woods.
Most people engage in some form of outdoor activity, and waiting outside overnight isn’t a new concept to them. Some are ready; some are not, but all of them will need to build some form of shelter sooner or later.
For the outdoor enthusiast, the experience of finding the right place to stay, building your fire, and building a survival shelter was the best adventure for them. However, this adventure can turn into a disaster if you’re not skilled in determining the safe place to stay and how to build a sturdy shelter that will protect you from rain or snow.
It is essential to know this skill during any outdoor activity because having no shelter can lead to disaster or even death.
Remember, preparation is the best tool in surviving outdoor adventure. Don’t just be an adventurer, be a true-blue survivor that’s ready and able to live in the wilderness.
The 7 Types of Shelter for Survival
Shelter is one of the essential factors that humans need. As mentioned earlier, covers will protect you from rain and snow. Other than that, it will protect you from wildlife, give you shade, can keep you warm, and it can protect you from cold or hot temperatures.
Terrible weather situations can cause death if you don’t have some survival shelter to defend you. It also has a psychological effect that gives hope and security that results in having a will to survive.
But you don’t have to be depressed. Here’s good news: many types of shelters are easy to build, which you can use in wilderness emergencies. Here are the 7 easiest types of shelter (besides a tent, that doesn’t count!) that you can build in the wilderness
- LEAN-TO SHELTER
- A-FRAME TARP SHELTERS
- DUGOUT SURVIVAL SHELTERS
- LEAF HUT
- SNOW CAVE
- DESERT TARP/DOUBLE ROOF TARP
- RAMADA SHELTER
Lean-To Shelter
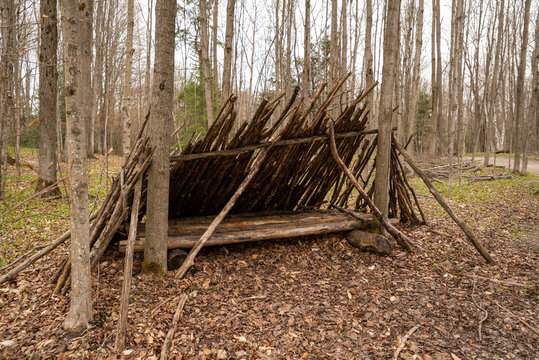
Lean-to is one of the easiest and most common constructed primitive shelters. It is easy to build and can put up in less than an hour using different materials. Lean-to shelter is a perfect defense from wind or rain that might encounter during an unplanned adventure.
How to Build Lean To Shelter
- Location is key, look for a flat place with two trees that have enough distance so you can lay down. When done choosing your site, clear the area, and remove any rocks or branches.
- When everything is clear, look for a straight and long branch that you can use as a ridge pole. Tie each side to the two trees. Do not place it too low so you can go inside quickly.
- Once you secured your ridge pole, cover one side of the ridge that will defend you from the wind.
Unfortunately, lean-to has weaknesses: it is vulnerable in heat, and if the wind changes direction, you are unprotected. The lean-to concept is like a house with only half roof that tenders little protection, deflects wind, and reproduces the adjacent fire’s heat.
A survival shelter like this is hard to see, so hang up something bright like a cloth or flag to mark the place. Unless you’re a military operative operating behind enemy lines, a bright and marked shelter is better compared to well camouflaged ones.
A-Frame Tarp Shelter
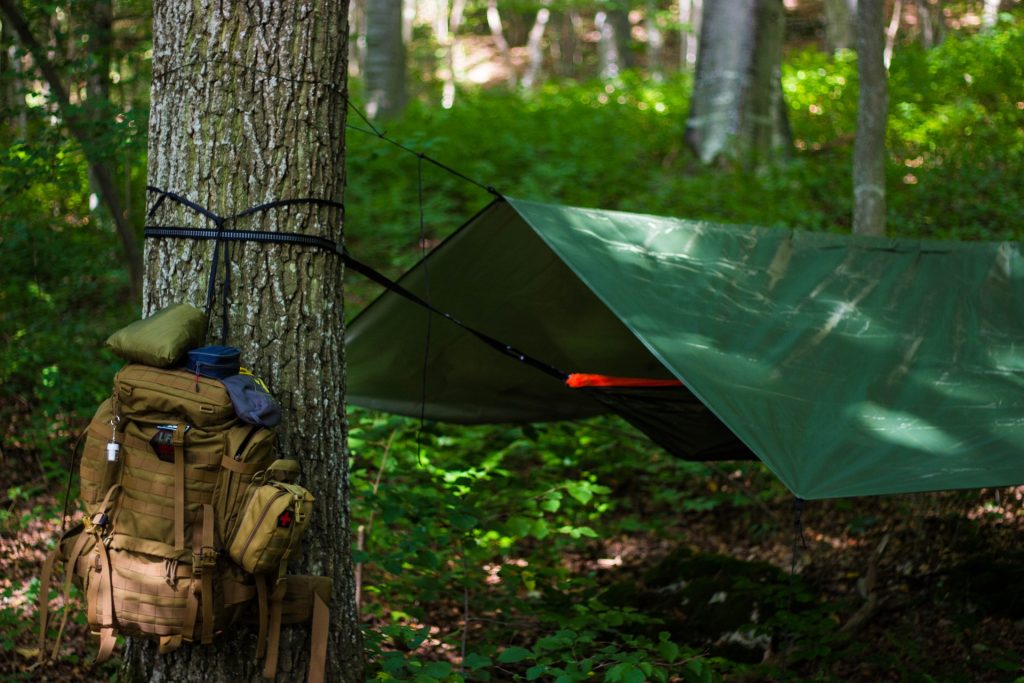
The A-frame shelter is one of the classic covers that can protect you from any weather. It provides excellent coverage and easy to build, you only need a tarp and a few cordage to get started. Once you find the right location, you will take only little minutes to set it up.
How to Build an A-Frame Tarp Shelter:
- Choose your location. Get a few sticks that you can use as stout stake approximately 4 to 6″ in length. You will use it in every corner. Also, you need one long ridge post measuring 36″ to stand up the opening.
- Bond a short length paracord through the eyelets of the tarp from the two end corners. Get a rock and put the stake into the ground to serve as tie spots for each corner. Please place them in the distance to make the tarp stretch between the sticks.
- Put the longer ridge stick into the ground at the tarp’s contradictory end near the middle. Avoid any contact between the tarp and the end of the stake
- Look for a small rock and put it in the middle of the tarp’s end. Fold it into a pocket within the tarp and tie. It will stabilize over the ridge, post the entrance of the shelter. Tie this to a tree.
- Put stakes at the front two corners and repeat the procedure in letter C.
- Make adjustments on the cordage if needed to remove any loose from the tarp. After this, relax and stay safe.
Make sure that the tarp is stretched taut to avoid any “water bulge” that forms in the roofs. After a while, these ‘water bulge’ will leak and make the inside of the shelter wet.
Usually, most beginner outdoorsman will have had a lesson on how to create A frame and lean-to shelters because these are the two most basic and easiest form of shelter in the wild. If you don’t know how to create a shelter, start with an A-Frame and a lean-to before delving deeper into the article.
Dugout Survival Shelter
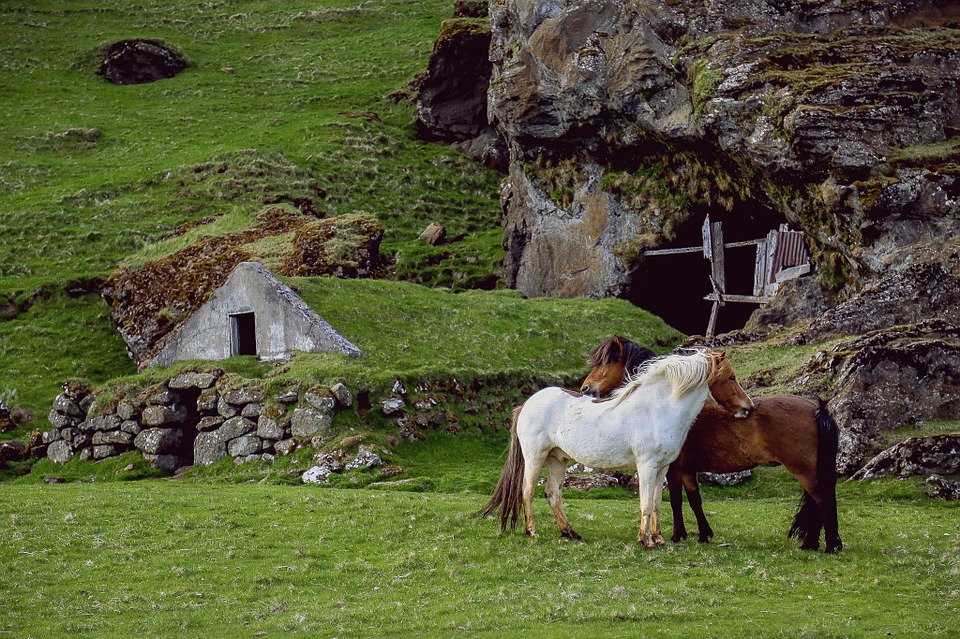
It is also known as Earth lodge or pit-house. Dugout or dugout shelters can make you safe against wild animals and cold nights because of their natural heat under the ground. It is a survival shelter that is flexible for any condition; however, it requires materials and tools that are slightly more complex compared to the first two shelters.
How to Build a Dugout Survival Shelter
- Look for a perfect spot. You will make a hole, so it is better to look for soil that is not too hard to dig. Also, choose soil that is not too sandy to prevent it from breakage.
- Remember, do not build near the body of water. Water might flow in your shelter if there is no impermeable surface separating you and the water.
- Prepare the tools and materials. Prepare the shovel for digging up the dirt, you can use your hand but it’s not recommended unless the soil is super soft. Keep on digging until you reach 8 to 10 feet deep or whatever depth you want for the shelter.
- Get additional leaves and vines to make your bedding. Be creative and arrange it like a crib or nest. It will also provide you the warmth that you needed on a cold night.
- Create the roof by stacking and lining up branches like a normal roof, tie them all up with cordage or with vines. Layer the branches with leaves to prevent rainwater from leaking in
- Create a door if you want or something to block the entrance, this will increase the security and insulation of the dugout survival shelter
In general, the dugout survival shelter is the most comfortable type of shelter you can build in the great outdoors. It will keep you dry, warm, and safe in almost any condition. However, it’s also probably one of the hardest to make correctly.
Because of that, if you’re a newbie outdoorsman, we recommend that you stick with tents and tarps for the shelter part while slowly learning how to build a great dugout survival shelter.
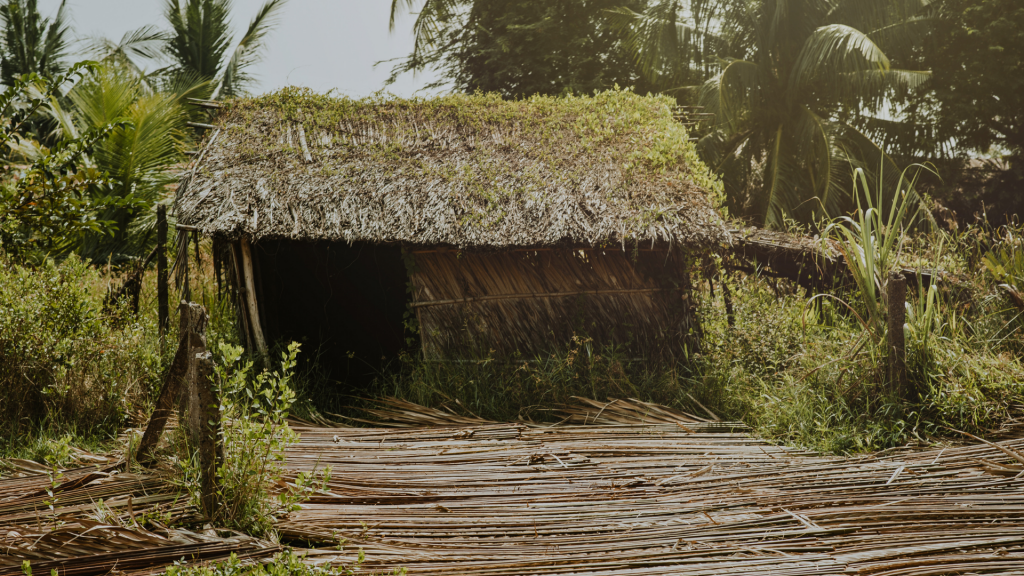
Leaf Hut Shelter
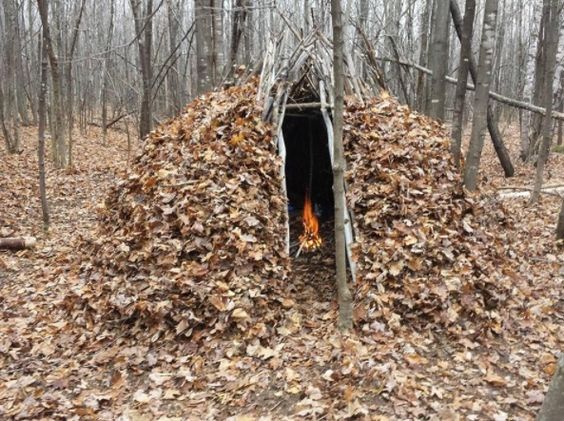
The leaf hut is a two-sided survival shelter with more weatherproofing and shielding abilities. This is identical to an A-Frame type of shelter but it forgoes the tarp and instead uses leaves and vines to substitute the roofing. Because of that, the leaf hut shelter is a godsend when you lose your shelter gear and need to camp out for the night.
It’s very easy to create a leaf hut shelter, you just need some cutting tools, vines, and couple of branches and a whole lot of leaves. Despite it’s simplicity, it’s insulating properties are quite good, It can help you protect from the night’s coldness, the heat of the summer, wind, or rain.
How to Build a Leaf Hut Shelter
- Select a long, straight branch that you can use as your pole. Be sure that it is sturdy, and it must be around 9 to 12 feet long.
- Pile it up in a tree, or you can also set it up on a rock. It can also place on two fork prop stakes.
- Then, shield the sides of the pole with tree branches to serve as a beam. It is in the direction along both sides of the ridge.
- Put the ribs together to prevent the covering fall.
- Pile vegetation or anything that can use as a shield against air like grass, fern, or pine needles above the structure.
- Last, make your bedding using leaves or the thick load of vegetation. Finally, you can rest and think about the next step how you can survive in the jungle.
However, the insulating properties of a leaf hut shelter is heavily determined by how good your shelter-making skills are. If you create a poor quality roof with too little leaves, then rain water will seep inside during heavy rain, making you and your gear wet.
Because of that, it’s recommended for newbie outdoorsman to continually practice creating a leaf hut shelter so they’re prepared for any eventualities.
Snow Cave Shelter

If you lost your way in the snow and need to spend the night, the snow cave is the best shelter to survive. However, among survival shelters, this one is the most dangerous to create. The result of staying inside for too long could make the occupant suffer from low oxygen. Also, if the ceiling collapses, you might be buried alive. Because of that, it’s important to build this type of shelter correctly.
How to Build a Snow Cave Shelter
- Look for a good location. In determining the place where you want to put up a snow cave, there are factors to consider, like the place’s location. Never set your snow cave near rockfall or windy slopes.
- The texture of the snow must also consider. Powdery snow is most likely hard to produce a cave because it is easy to collapse.
- Deep, hard drift and dig into the side of it. Shape a tunnel into a low place.
- If you find the perfect place, it’s time to dig out the cave. To reduce the risk of hypothermia, better to dug slowly to avoid too much sweat.
- If the snowdrifts are deep enough, you need to shovel them into a pile of at least 1.5 meters tall. The technique in piling up snow is to find a short slant and push the snowdrift using the shovel through to the ground of the slope.
- Place the snow steadily by stomping it. You can place plywood above it before clomping it.
- Let the cold air harden the snow for approximately two to or more hours. It will also help the snow cave firmer and reduce the risk of collapsing.
- Dig a tunnel into the snow and make it wide so you can go inside smoothly.
- Stick branches or ski poles for about 12-18 inches deep that serves as a guide in digging out the cave from the inside. If you saw these objects while digging, it serves as a sign to stop. Also, it will prevent you from making the ceiling too thin, causing it to collapse.
- They hollowed out the dome of the cave to create a room for your body. Strengthen the cave by using water to make it stronger. However, never put water over the shelter if the temperature is too freezing. It will make the snow heavier and can cause collapse.
- Make finishing touches inside the cave. Scrape walls and roof to make water drips flow to the edges.
- Mark the cave outside to helps outsiders determine it. Use bright colors or branches that are visible and easy to notice.
- Snow caves can become relatively insulated to prevent suffocation and create ventilation holes that go through the roof.
- Collect pine branches and place them on the ground of the cave. It will help gradually escape the heat through the floor.
For safety reminders, keep your shovels near you. In case that unfortunate thing occurs and your snow cave collapse, you can dig out with your shovel.
You also need to keep in mind that shelters in cold or freezing temperatures work to prevent heat loss and to prevent wind chill. You still need the necessary gear to sleep warmly inside the shelter, that’s why you’ll need to bring a specialized sleeping bag for cold conditions along with a sleeping bag liner to improve it’s warmth. Go check out our guide on the best sleeping bag liner for cold conditions!
Desert Tarp/Double Roof Tarp Shelter
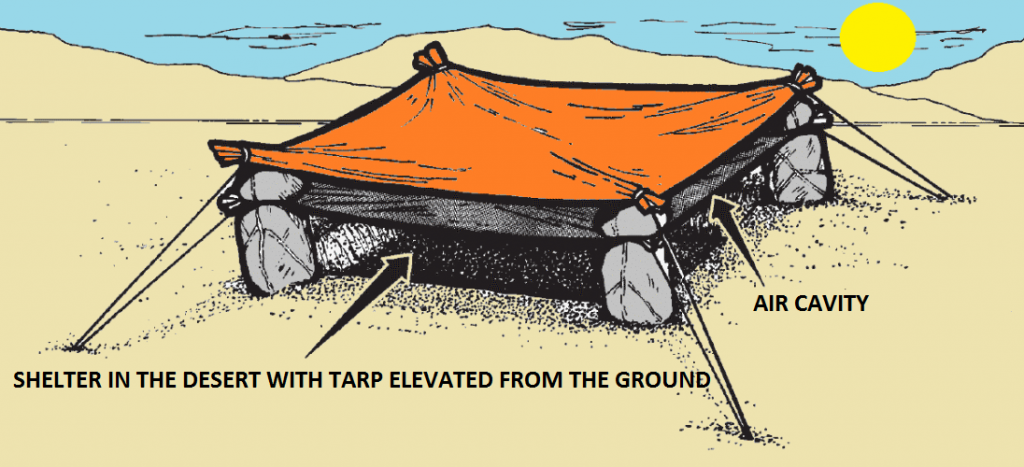
In an emergency in the desert, a desert tarp is one of the best types of shelter for survival that can set up. It is easy, and you will save body movement that will cause you too much sweat. Remember that stuck in a desert, you must consider that exerting too much effort and time can cause your body to drain energy. In this case, you need to save your power to avoid dehydration and death.
Desert tarps will also help reduce the incoming solar radiation during day time, and the radiative cooling during night time. This insulating feature helps shield your body from the jarring temperature changes in the desert and will increase your chances of survival.
How to Build a Desert Tarp Shelter
- Find a perfect place where you want to dig a low spot in the ground. It should be 1 to 2 feet.
- Tie the first tarp to sticks a few inches off the ground and fasten the second tarp approximately a foot beyond the first tarp.
- Stakes and ropes can use or big rocks or anything you can find.
- If you don’t have two tarps, you can fold it so you can make it double. Be sure that the space between the fold is one foot. The use and goal of this technique are to prevent too much direct heat from the sun.
However, you need to keep in mind that in the desert, the danger does not only come from the heat, but also the strong winds. Because of that, you’ll need to keep in mind the wind direction and set your gear accordingly to help block the wind from hitting your body.
Ramada Shelter
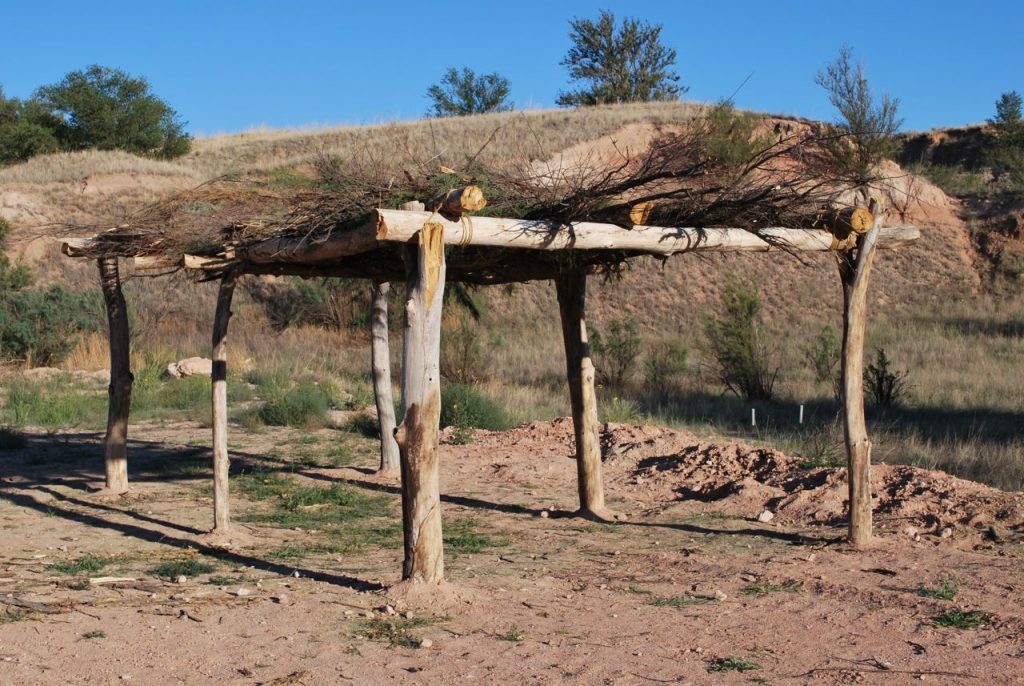
The Ramada shelter is one of the basic types of shelter for survival. It may not protect you from the rain, but it does block all the heat from the sun. This shade is perfect if you are trap in a sunny and hot place.
Ramada shelter differs in the design, but most of them base on four posts. Their beams are lightweight to avoid collapse. Materials that can use in building this shelter are tarps, branches, or mats.
Remember that this type of shelter is not easy to build. However, if you are using a tarp as a roof, then it will just be comfortable.
How to Build Ramada Shelter
- Find a place where you can put four poles away from each other. Distance may vary on the shape of the tarp or your preferred size.
- Install the poles and tie the tarp on each side. In using branch roofing, be sure to create and fix its beam. Tie it firmly so that it will not easily collapse if you place branches as roofing or anything.
- Add leaves and other layering materials as necessary, more roofing materials will ensure that the shelter is weatherproof and will provide a measure of protection from the rain. If you’re using a tarp as roofing, then the Ramada will be waterproof and can protect you from the rain
Keep in mind that although Ramada shelters seem cozy and spacious, they are not that easy to build, especially if the soil is hard. This is because you need to pound the wooden beams into the soil to create a solid foundation for the roofing.
Do’s & Don’ts in Survival Situation Related to Shelters
During a survival situation, there are things you should do and things you shouldn’t do. These things will affect the probability of you surviving the ordeal and coming home safely.
Do’s During a Survival Situation
- Be sure that at least two people are aware of where you are going and your expected return. Make sure they know your camping/shelter spots too so that they can look for you there
- The presence of mind and being calm are also some of the keys to surviving in the wilderness. Switch off your panic mode because this will not help you think clearly. In case of an accident, treat your accident first and then find a place to hunker down
- If you need to eat, always choose animals, bugs, and fish as your top priority for food consumption rather than an unfamiliar plant to avoid poison plant intake.
- Do not move around. Stop in one place for a moment until you have decided where to go. This is why you need intimate knowledge of how to build camps
- Always remember the three essential things other than food: these are air, water, and shelter. As everyone says, you can survive three to four weeks with no food, but only approximately three hours with no shelter, three days with no water, and three minutes without air.
Don’ts During a Survival Situation
- Don’t consider mushrooms as food. It can be deadly if you accidentally pick the wrong mushroom. Because of that it’s important to
- Avoid dead or rotten trees when building shelter. It may collapse and injure you further
- Don’t fail to notice your surroundings when you are walking. Pay attention to every place you are going or settling. Be aware of the creatures you may encounter, like deadly or infectious bugs, snakes, and spiders.
- Don’t move around too much, you’ll waste energy and risk depleting your food/water stores
- Don’t stay around in one place if it’s dangerous. It’s okay to move, but move with purpose and try to find shelter as soon as possible.

FINAL THOUGHTS
We’ve discussed the best and easiest types of shelters to make along with their pros and cons. Each of them are the best in their own right, you’ll need to judge for yourself when it’s time to create a dugout and when a simple ramada or an A-frame will suffice.
However, you need to remember that creating shelter requires 2 things, knowledge and tools. Knowledge without tools will have a hard time creating a great shelter. Tools without knowledge will not know what to do or build for the specific survival scenario.
Because of that, it’s very important for outdoorsmen and survivalists like us to constantly learn and read new things so that we can be prepared for any eventualities. As they say, if equipped with survival knowledge, you can conquer the wilderness confidently.

