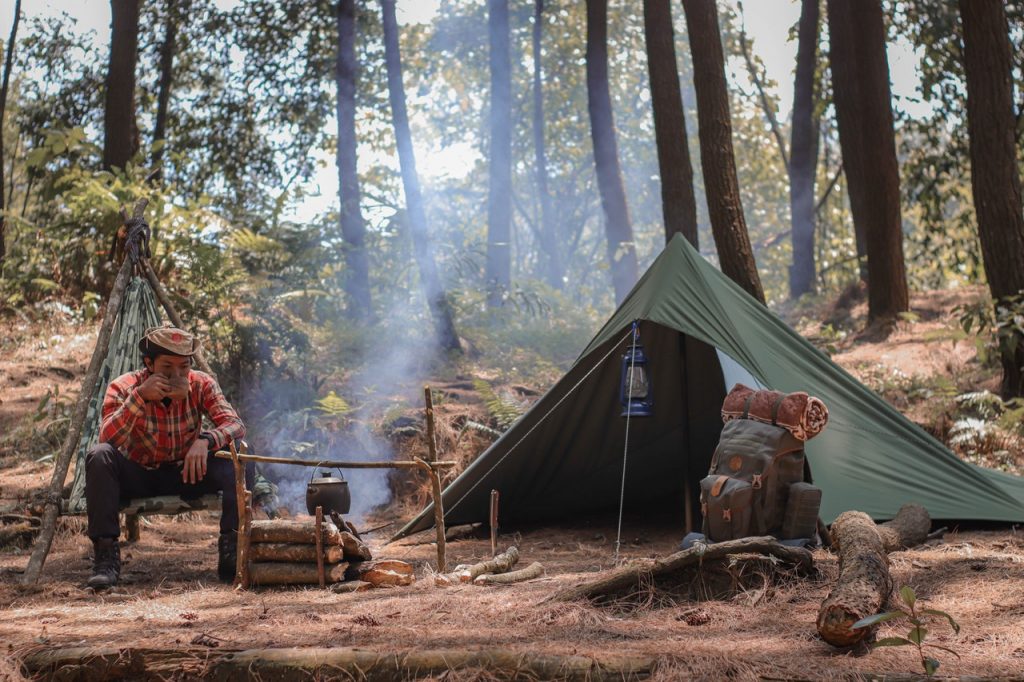
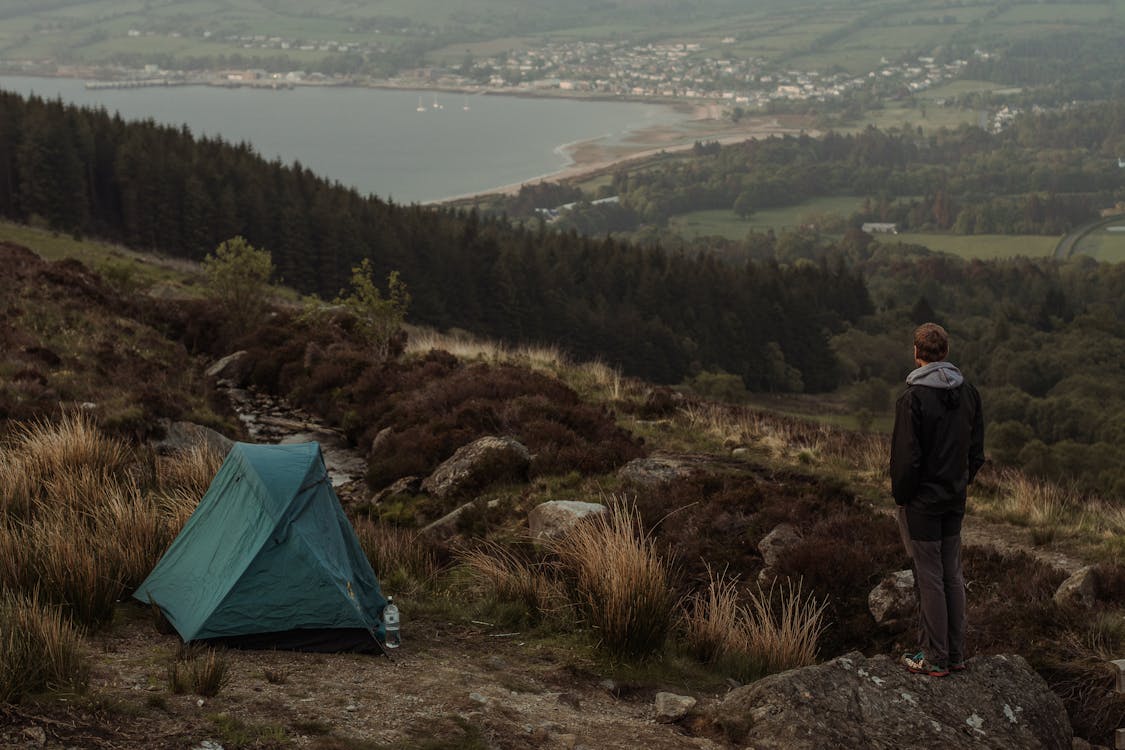
The 5 C’s of survival is an easy way to remember the 5 things you need to have with you. These five things will help you survive anything, be it being stranded in the forest or a hiking accident. It can turn a potentially deadly situation into a safer one by providing you with the basics to survive.
If you’re the type of guy that loves doing outdoor activities learning the 5C is very important. Without it, you’ll be at the mercy of mother nature if you get stranded without help.
In this article, we will talk about what the 5C’s of survival stands for and why it’s important for you. After that, we’ll also get into the details on each of the 5C’s. If you’re interested in learning about the most basic concept of survival and preparedness, read on!
What 5C’s Stands For
5 C’s of survival stands for Cutting, Cordage, Combustion, Container, and Cover. If I can only carry 5 items with me during a hiking trip, those items will probably consist of the 5 C’s of survival.
- Cutting refers to anything you can use to cut or break another object
- Cordage refers to anything you can use to tie up an object
- Combustion refers to anything that’s related to starting a fire
- Container refers to anything you can use to carry something else
- Cover or shelter generally refers to things that you can use to shelter yourself from the environment
Each of these 5C’s have a dedicated item that’s associated with it. When we’re talking about cutting, you’ll probably be thinking about a knife. Paracord and duct tape for cordage. Fire-steel and a waterproof match for combustion. Ziploc bags for container, and a tarp for cover.
If you don’t bring dedicated equipment, you may still be able to improvise using items found in the wild. You can use branches and logs found in the wild to create a friction-fire hand drill. You can create an improvised rope or cordage using jungle vines. You can even create containers using bamboo segments, hollowed out logs, or animal skin!
The potential for finding and using supplies from mother nature will depend on the type of environment you’re in. If you’re in the desert, it might be harder to find cordage and container. Meanwhile, in the tropical rainforest, it can be hard to find wood that’s combustible and not damp.
Because of the randomness, it’s much better to carry supplies with you into the wilderness than relying on mother nature. It’s much safer, much easier, and you can also control the quality and quantity of the tools that you bring.
Why the 5C’s of Survival is Important
The 5C’s of survival revolves around the concept of Four Components of Survival which are fire, water, shelter, and food. These four components are basically what you need to survive anything. Fire for heat, light and processing food. Shelter to protect you from the elements and wild animals. While water and food is beneficial to keep you alive and supply you with energy.
The tools you bring into the wild will greatly influence your ability to secure and maintain these four components. Miss one tool and you might find yourself lacking in one department. Life and death can sometimes be determined by a simple tool.
Imagine if you’re stuck in the rainforest without a fire steel, it’d be pretty hard to create a friction drill with all the damp wood around right? Also, imagine you’re stranded in the dessert, it’d be pretty hard to find shelter without bringing one with you, right?
Even if your life isn’t at stake, choosing the right component can mean the difference between living comfortably and being tortured in the wilds.
Choosing the right supplies to bring can be daunting and confusing for just about anyone. There are tons of options, some good but a lot of them bad. Because of that, putting together a well prepared and properly stocked survival kit is a complex task.
However, if you follow the four components of survival detailed above and the five C’s of survival that’s detailed in this post, you’ll be off to a great start.
Each C on the list of 5C’s of survival is a general guide to what type of equipment you should bring and why you should bring it. Each C can have multiple equipment for different purposes, depending on where you live or where you want to go.
For example, you can choose to bring a pocket knife and a survival knife for your cutting needs. However, if you’re planning to go to a tropical rainforest, it’s better to bring a machete to help clear the foliage.
The key here is to analyze where you live, where you’re going to go and identify what situations will likely occur. After that, you need to make a list of what can go wrong and how to mitigate it. After that, you can contextualize that list with the 5C’s of survival.
Another important thing to remember is that it’s a good idea to include several different options for every C’s of survival. This aligns with the concept of not putting all of your eggs in one basket. Besides mitigating risks associated with lost gear, it can help you prepare for a wider variety of situations.
However, keep in mind that even though redundancies and back-up tools are great, weight is also a big factor in survival. Always try to pack light and use tools that fulfill multiple purposes rather than single-purpose ones.
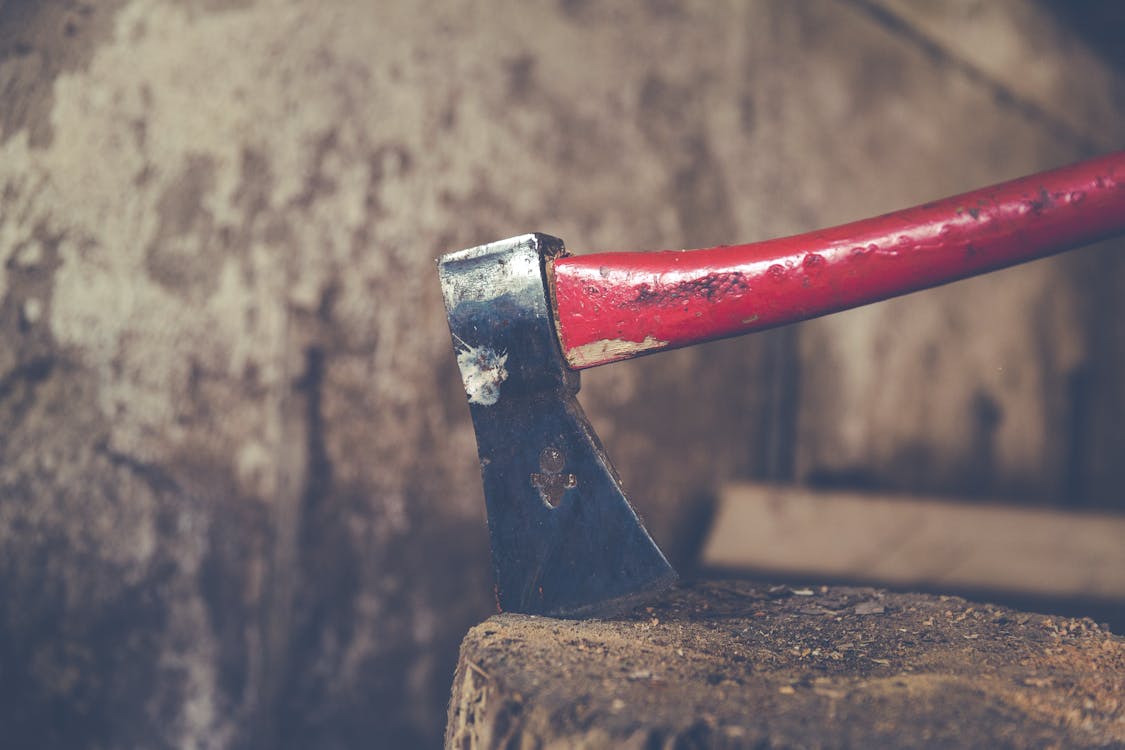
Cutting
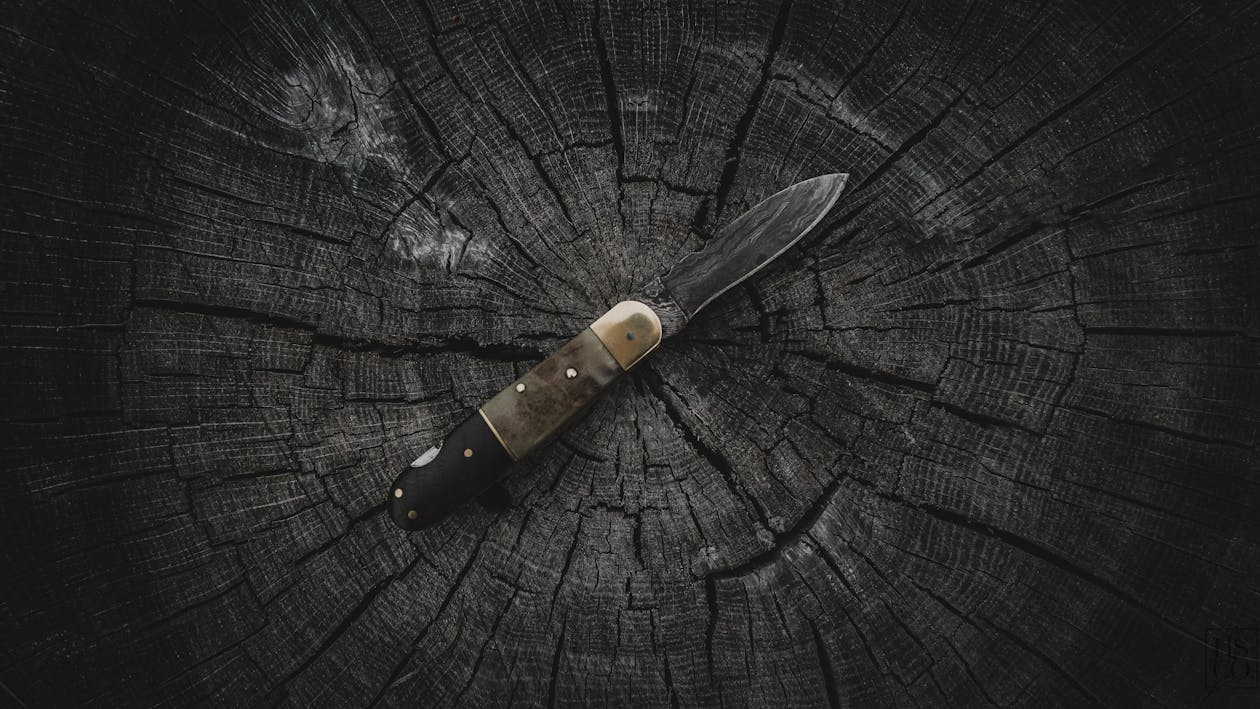
A good cutting tool is one of the most important things to have at your side during a survival situation. Any cutting tool will do, be it a pocket knife, multitool, machete, survival knives, or even an axe.
Imagine a situation where you’re stuck in the forest without a knife or machete, you can’t do anything right? You can’t chop wood to create fire and you also can’t fend off dangerous animals. Because of that, cutting tools are considered one of the 5C’s of survival.
Cutting tools are very versatile, they can do almost anything you need. They can process food and firewood, cut cordage and fabric, harvest edibles, or start a fire. The uses of a cutting tool is limited by your imagination and the type of cutting tool you bring.
A decent multipurpose cutting tool is so important that many preppers say they’re possibly the most important of the 5 C’s of survival. We won’t go that far, but we agree that having a cutting tool handy will greatly increase your chances of surviving.
The Different Types of Cutting Tools
There are many different types of cutting tools that you can bring with you, however, those cutting tools have different purposes and functionality. Some of them are great at something while being poor at another while some are all rounders, not great at anything but not particularly bad for anything too.
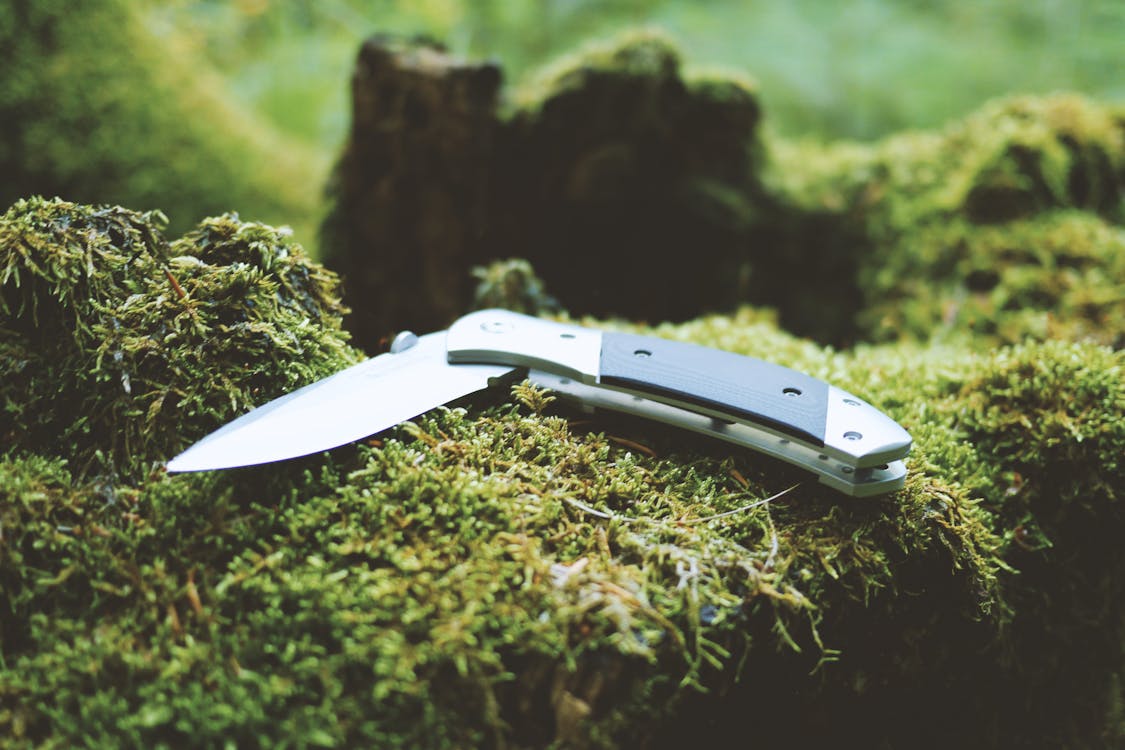
Large machete and hatchets are great for chopping large blocks of wood and splitting firewood. However, they’re cumbersome and not suitable for fine cutting activities such as meat processing or skinning a game. Pocket knives on the other hand is a great general-use cutting tool, but it sucks for clearing a path through a forest or to cut large blocks of firewood.
Having a saw handy would be a godsend if you need to cut in half a big piece of wood or to cut a large branch, but besides that, it’s not good for anything else.
Because of that, it’s a great idea to have multiple types of cutting device for different purposes in your EDC and survival kit. It’s also a good idea to sprinkle in a few multipurpose tools in there as back up incase your main cutting tool is damaged and is unable to be used.
Personally, when out and about in the woods, I always carry a fixed blade knife and a machete at my side to handle general cutting needs. For more specialized purposes, I also bring a folding saw and multitool in my backpack.
When going camping, I also like to bring an axe for felling trees and splitting firewood. Having an axe on hand speeds up the process of gathering firewood massively and saves a lot of energy. At least compared to using a machete or using my foldable hand saw.
Cutting Tools and the Environment
Different cutting tools are also suited to certain environments, make sure you know what you need based on where you live and what you’re likely to encounter.
In general, a machete is great for tropical areas or areas with lots of thick brush and vines that gets in your way. An example of these kinds of areas would be in tropical rainforests and jungles, especially during warm months. Machetes can easily clear a path through the brush and vines of the jungle. However, it’s not ideal for chopping deadwood or to chop down large trees.
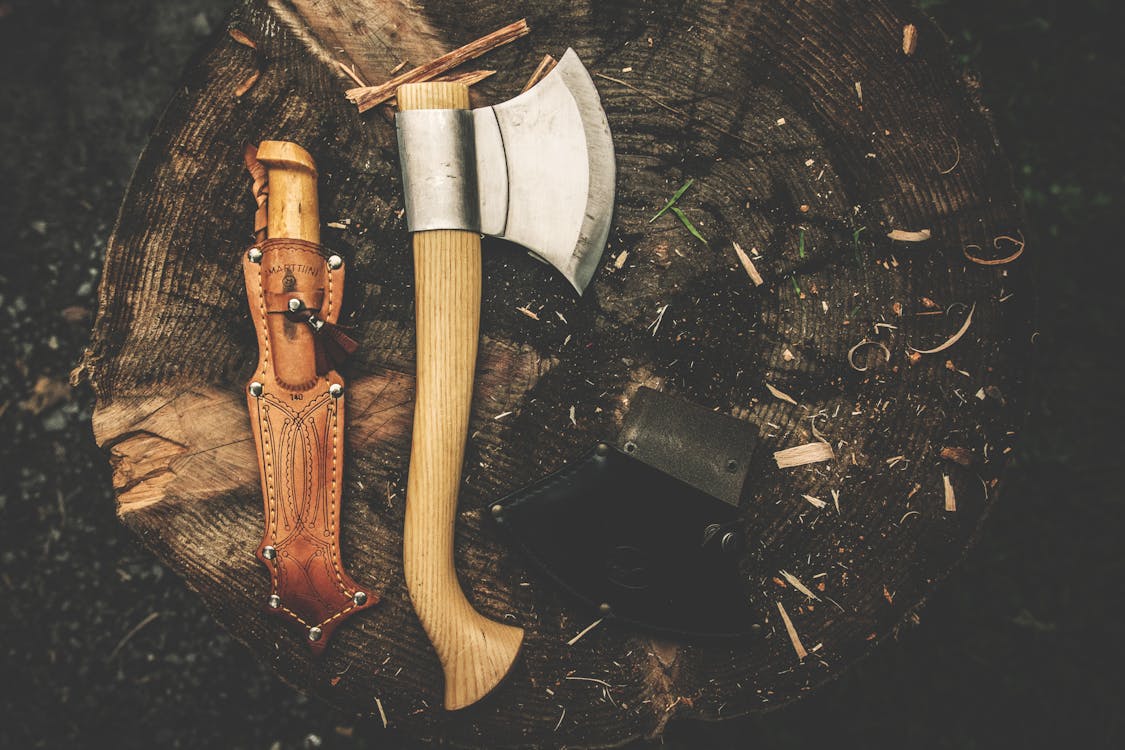
Axes and hatchets are ideal for chopping down large trees and splitting firewood. However, they’re ill suited to clear brushes and vines like a machete. Because of that, axes are popular as a cutting tool for people active in or near boreal forests and temperate forests, not so much for outdoorsmen in the tropics and in the equator.
A saw, be it a foldable saw or a full fledged one can cut through large blocks of wood very easily without too much strain. This is ideal if you need to cut down a lot of trees and you also need to cut them down to size, either for a campfire or for other purposes. However, they’re not much good for anything else, they’re also pretty difficult to sharpen, especially in the wilderness.
Fixed blade knives are like the jack of all trades of cutting tools, they can be used to process food and firewood and make delicate precision cutting. Larger ones can even be used like a machete to clear brushes and vines if you’re in the jungle. However, fixed blade knives suck at cutting down large blocks of wood or splitting firewood, unless you use a special method.
Large high-quality fixed blade knives can be used to break down large blocks of wood with a method called batoning. In layman terms, this is when you put the knife on the wood and then hammer the knife with a piece of rock or log. This basically transforms your knife into a makeshift axe that can split logs pretty efficiently.
However, be aware that if your knife is not a full tang fixed blade knife, batoning may damage it beyond repair. The stress applied to the blade when batoning just might cause the steel to crack and render the knife unusable.
Personally, this is something I rarely do and actively try to avoid doing because of the above. Besides that, batoning is also less efficient compared to simply using a full blown axe or a machete to cut down and split the log. However, if you only have a knife, you can use this method if and only if your blade is a full tang fixed blade knife. Don’t even try if you have a foldable blade, it’ll just snap on impact.
Multipurpose Cutting Tools
If you want the best multipurpose cutting device, a kukri type of machete is often considered to be the best multifunctional cutting tool. The tip of the kukri can be used for fine carving and meat processing, the middle is thick enough for chopping wood like a regular machete, and the hilt has a curved area for shaving wood and processing firewood.
The kukri also has a unique shape where it’ll put more force towards a blow compared to a regular machete, but not as much as an axe. You’ll find it easier to chop large blocks of wood using a kukri compared to a machete or a fixed blade knife.
However, being a multifunctional tool, the kukri can’t do it’s job better than a more specialized too. It can’t split logs better than an axe, it’s heavier and more unwieldy compared to a machete when clearing vines and brushes, and it’s harder to process food and firewood using a kukri compared to a fixed blade knife.
Buying a Cutting Tool: Saving Money vs Saving your Life
As we’ve said multiple times, you shouldn’t cut corners when it comes to survival tools, especially tools related to the 5 C’s of survival.
Imagine this scenario, you’re in the middle of a forest, 2 days away from the nearest civilization, enjoying your nature hike. Suddenly, your ‘cheap’ blade breaks when processing firewood and your ‘cheap’ machete bends when used to cut up a large log. Those few bucks that you save will become pretty meaningless compared to spending the night without a campfire and well cut food.
This doesn’t mean you have to spend thousands of dollars on the best gear ever, you just need to be sensible when buying survival tools. Do some research into the manufacturer, materials, and features of any cutting tool you’re going to buy. Read the reviews too so you can get a better idea of the product from the mind of the consumers.
All in all, a great cutting tool, be it a knife, axe, or a machete doesn’t have to be very expensive. However, they won’t be super cheap too. Be sensible when buying these things and adjust your expectations based on your budget.
Cutting Tool Materials
A common question regarding cutting tool build materials would be to go for stainless steel or high-carbon steel for the blade. Each has it’s pro’s and con’s and you should pick one based on your needs and wants.
In general, stainless steel is more resistant to rust compared to high carbon steel. However, they’re softer and will get dull faster. High carbon steel on the other hand is harder and will keep it’s sharp edge for much longer compared to stainless steel. However, you’ll have to devote more time and attention to care for it so it doesn’t rust and degrade with regular use.
If you want a simple knife that doesn’t need much maintenance, can get wet, and will generally perform in most conditions, get a stainless steel knife. However you’d probably need to sharpen it often and especially if you frequently use it to cut down large blocks of hardwood.
Personally, I myself prefer to use a high carbon steel cutting tool because they maintain a sharp edge for longer compared to stainless steel blades. We frequently cut large blocks of firewood with machetes so a stainless steel one would lose it’s edge pretty quickly. I also find it quite relaxing to sharpen and oil my machete and knives after every outdoor trip so that’s a plus too.
Cutting Tool Maintenance
As we’ve said before, we would recommend oiling your high carbon steel blades regularly so that they’re protected from rust. Besides that, you’ll also need to wipe any sort of stains or water after every use to ensure no rust develops on the blade.
How much you should sharpen and oil your blades definitely depends on the environment you’re in and what you’ve done to the blade. If you’re active in moist tropical regions, your blade will probably rust easier due to the constant exposure to water and the humid air. Because of that you’ll need to oil it frequently, probably after every outdoor trip with the blade.
If you frequently cut large blocks of firewood or just wood in general with your machete and blade, you should also sharpen your blade frequently. This ensures that you’ll have a sharp edge every time you go out into the wild.
In the event that your blade rusts for whatever reason, you can simply sand it down with a fine steel wool first, then you can sharpen and oil the blade. I usually like to keep a bottle of mineral oil and cotton inside a plastic bag for oiling the blades. Mineral oil is food safe, so it wont poison you when you need to use your blade for processing any food items.
Some ore expensive carbon steel blades come with high-tech coatings that claim to prevent corrosion and rusting. However, they still should be oiled regularly, you never know when the coating will break down due to regular use. It’s better to be safe than sorry.
Sharpening your Cutting Tool
As a survivalist, you need to keep your cutting tools at tip top condition, this means they should always be sharp and clean of any rust. It’s very hard to chop wood or process food with a dull blade, besides requiring more energy to cut with it, it can also become unwieldy. A dull blade can be more difficult to control and more prone to slipping because you need to exert more energy.
Because of that, it’s very important for you to keep your blade well maintained using the above strategies and also to keep it sharp.
There are multiple ways of sharpening your knife in the wilderness using nothing but natural materials. You can use a regular rock, quartz, or even leather to help polish and sharpen your knife. However, we recommend always carrying a lightweight V sharpener in your pack.
Besides being easier to use compared to a rock, having a dedicated blade sharpener is a godsend when you’re cutting a lot of hard materials such as hardwood. By carrying a compact blade sharpener, you’ll always ensure that your blade is sharp and ready for action.
Cordage
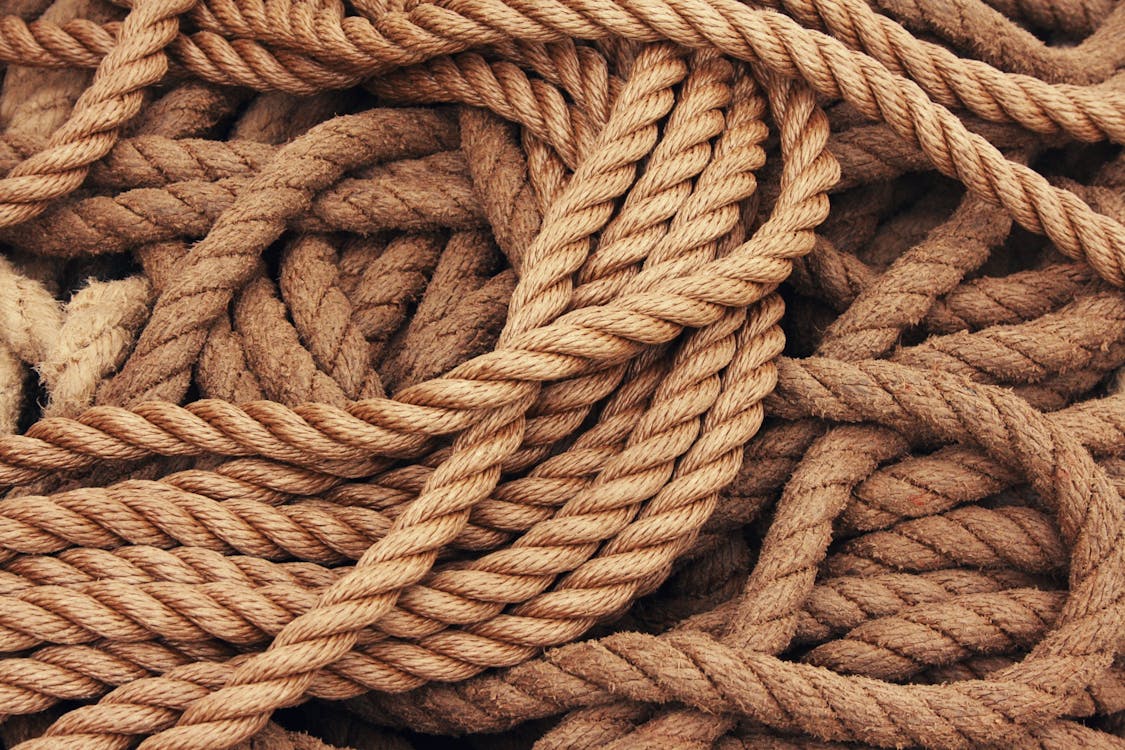
Cordage is one aspect of the 5C’s of survival that’s easy to overlook but is actually very important. The importance of cordage may not be as obvious as cutting, combustion, or cover, but it’s the aspect that supports and enables you to succeed in the other aspects.
Cordage is a catch-all term for rope, strings, tape, webbing, and so on. These items are used to create multiple things such as a clothes line, a climbing rope, hanging hunted animals, hanging food, bandaging a wound, making hunting nets, and so much more.
Some forms of vines and roots can also be considered cordage if they’re strong enough. You can find them scattered in the forest, so if you didn’t bring enough cordage, you can simply find more in the forest.
Keep in mind that having your own pre-made cordage such as a paracord, rope, wire, or tape will be infinitely easier compared to having to search for them in the wild. Because of that, it’s always a good idea to bring an ample amount of cordage with you.
Cordage Uses
As we’ve said before, cordage is a very versatile tool, you can use it for nearly everything from patching holes and wounds to creating new things such as a floatation device or a bow.
The creation of some types of shelter (or cover), another aspect of the 5C’s of survival highly depends on what kind of cordage you have at hand. When making a shelter from tarps or a bivouac, the poles and roofing often need to be tied up to a nearby tree or to the ground. This is where cordage comes in handy to help you create a better shelter.
Cordage can also be used to help you carry supplies, either by making a makeshift shoulder strap or to tie supplies to your backpack. Besides all of that, cordage can also be used in a multitude of ways to substitute something that we don’t have. It can be used as a belt for your pants or even as your shoelace.
Some forms of friction based fire-starting such as bow drill will need ample amounts of cordage. You can use all kinds of ropes and even vines to start your own fire in the wilderness.
If you need to cross a body of water, you can also use cordage to fashion yourself a makeshift raft or canoe. This is done by tying together logs of wood so that they create a boat-like shape. You can also make a makeshift floatation device by wrapping your bag with a poncho and tying it up real good.
Strong cordage can be used to create improvised weapons such as a bow, lasso, or even into a bola throwing weapon. It all depends on your creativity and the availability of materials around you.
If you’re camping in a particularly dangerous area, you can also make a trip-wire alarm by tying noisy utensils to a rope. It will alert you if anything or anyone attempts to come near and inadvertently bump into the rope.
Cordage can also be used to render first aid in the wilderness. You can use it to strap a brace against a broken bone, create a sling for an injured arm, or to create a stretcher for evacuating an injured person. You can also use it to pull an injured person up a ledge or to lower them down, the same can be said for supplies. And obviously, you can use cordage as a makeshift tourniquet to stop bleeding.
Some type of cordage are also flammable so you can shred them and use them as kindling to start a fire. However, make sure that your cordage is flammable and is not wet, wet and fire resistant cordage won’t catch fire. You can also use them as a candle wick by submerging it in wax, fat, or oil, leaving a tiny part of it exposed, and then lighting it on fire.
When needed, larger cordage such as ropes can also be broken down into smaller filaments that may be used as a sewing thread, fishing line, or even to stich together wounds.
Basically, cordage is one of those survival items with almost infinite uses. The usefulness of cordage in survival situations highly depends on your knowledge and imagination. Because of that, having cordage in your EDC gear and on your body is always recommended.
Improvising Cordage
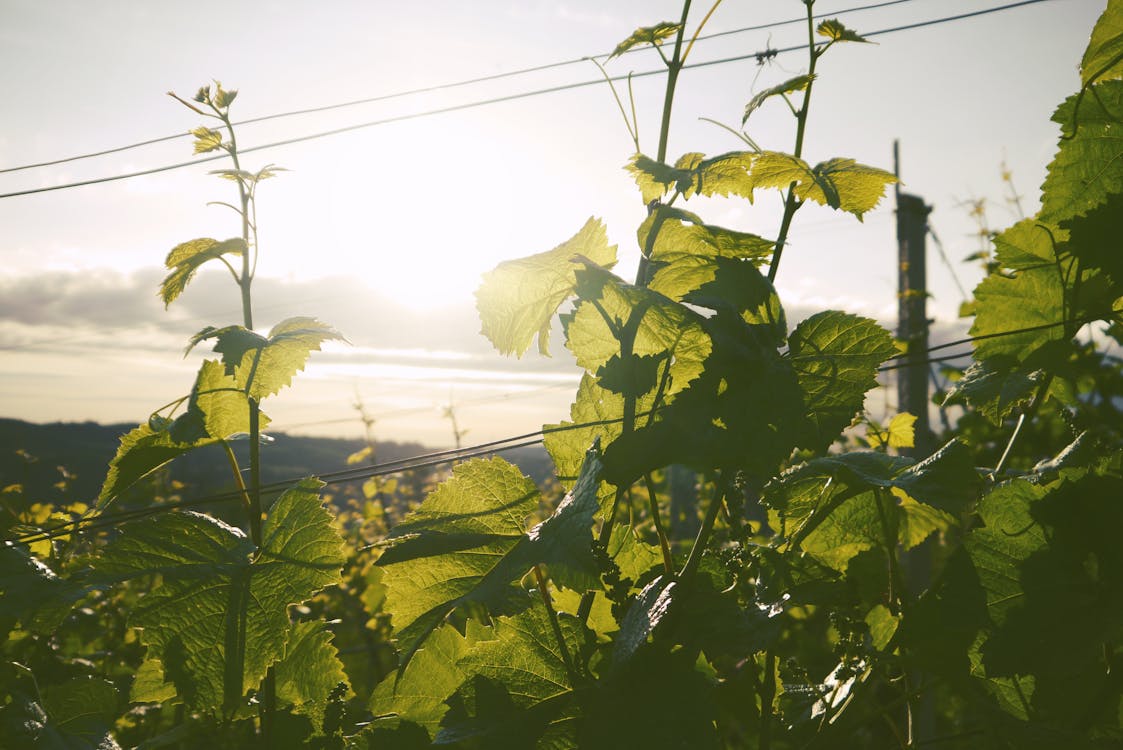
As we’ve said before, cordage can also be improvised from natural materials in the environment such as vines and roots. When you’re in the jungle, you can find lots of vines that can be transformed into decent quality cordage with little effort.
Smaller vines tend to work better as cordage because they’re more flexible. Flexibility is also the reason why green vines are preferred over woody vines, they’re more flexible and bendable. If you’re having trouble bending your vines, you can also soak them in water and leave it be for a night, it’ll make them more pliable.
It’s relatively easy to find vines in jungles, however, if you’re in the north or in a boreal forest, it can be hard to find vines. In this scenario, you should be aware that you can also create cordage by using plant fibers from barks and even leaves.
Check your surroundings, is there any plants with long, fibrous strands? If yes, then you can try to turn it into natural cordage.
Qualities of a Good Cordage
In general, there are three main qualities of a good cordage that you should look out for when choosing one, especially if you’re trying to improvise using natural materials. The three main qualities are length, strength, and flexibility. A good quality cordage should have all three in spades, if it’s weak in any of them, it will be less efficient and quite ineffective.
Strength is very important, what good is a rope that breaks easily? It won’t be effective if you need it to hold weight or to secure yourself during a descent. If your rope lacks strength, you can try weaving and braiding some of them together to make a bigger stronger rope.
Length is an important aspect of a good cordage, in general, a longer rope is better compared to a shorter one because it will be easier to tie things with it. Having a longer rope means that you can tie almost anything and use almost any knot. If you have a short rope, you’ll need to carefully use the most efficient knots and might not be able to securely tie something.
If you have several short pieces of rope or any cordage, you can tie them all together into a longer rope using a double fisherman’s knot. This is useful if you brought several short ropes during a trip and suddenly need a long rope for a certain situation.
Flexibility is also an important aspect of cordage, a highly flexible rope is better compared to a stiff one because it can accommodate lots of movement from your end. A flexible rope is easier to store, to manipulate, and also to fasten to something.
You can try to split your rope lengthwise to make it thinner and more flexible, however this is not recommended if you use expensive and complicated ropes such as a Kernmantle rope.
Cordage Choices

As we’ve said before, cordage is a very broad term, there are a lot of different cordage available at your local hardware and outdoor store. Climbing rope, boat rope, cotton string, plastic rope, paracord, bailing twine, and leather rope are some popular choices.
One of the most popular choice for cordage and one which I frequently use is the paracord, more specifically the 550 paracord. It has a high tensile strength, durable, flexible, very lightweight, and also thin, because of that, it can be used for almost anything. It can also be broken down into smaller thinner ropes if you need it.
550 paracord is made out of nylon and is quite durable, however it’s still easy to cut with a well sharpened knife. It’s also pretty inexpensive compared to other decent quality cordage options out there.
When out and about in the wild, I always carry a few bundles of 550 cordage along with a little bit of plastic rope which is cheaper for less demanding tasks. Don’t skimp out on cordage, it can be used for almost anything so it’ll always be useful for you.
Another great survival item that has multiple uses and can be improvised into cordage with a little effort is the venerable duct tape. This item is so useful that it comes standard in a few store bought survival kits and pre-packaged camping gear.
We recommend carrying a few small rolls of duct tape in your backpack during an outdoor trip, heck, we recommend carrying a duct tape inside your EDC kit. However smaller rolls are recommended compared to larger rolls because it will be easier to fit inside your backpack or emergency kit.
Having a heavy-duty duct tape such as a gorilla tape is better compared to the lighter ones because they’ll be more durable and can be used for multiple purposes. You can use it as an improvised cordage, to seal holes in your shelter, or to act as an emergency bandage.
The uses of duct-tape is near infinite, it all depends on how much duct tape you bring and your imagination. Because of that, we recommend bringing a lot of duct tape.
Making Use of Cordage: Knots
Okay, so you’ve gone and bought the best cordage, what next? Well, you’ll need to learn how to use it of course, what good is a cordage if you can’t use it to tie anything right?
In order to be effective with cordage, you’ll need to learn some basic knots and their purposes. This will help you utilize your cordage in any scenario and may even help you get out of a sticky situation. You don’t need to know every knot in the book to effectively use cordage, you just need to know the basic ones that will save your life.
The knots that I frequently use in the outdoors is the square knot, bowline knot, clove hitch, and double fisherman’s knot, a taut line knot, and the figure eight knot.
However, it’s not enough to know these knots, you also have to practice using them so that when shit hits the fan, you’ll be ready. What good is knowledge if you can’t apply it in the field right?
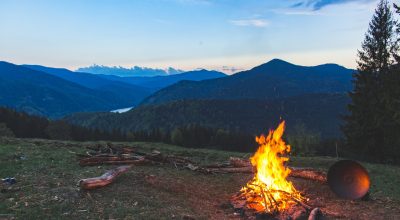
Combustion
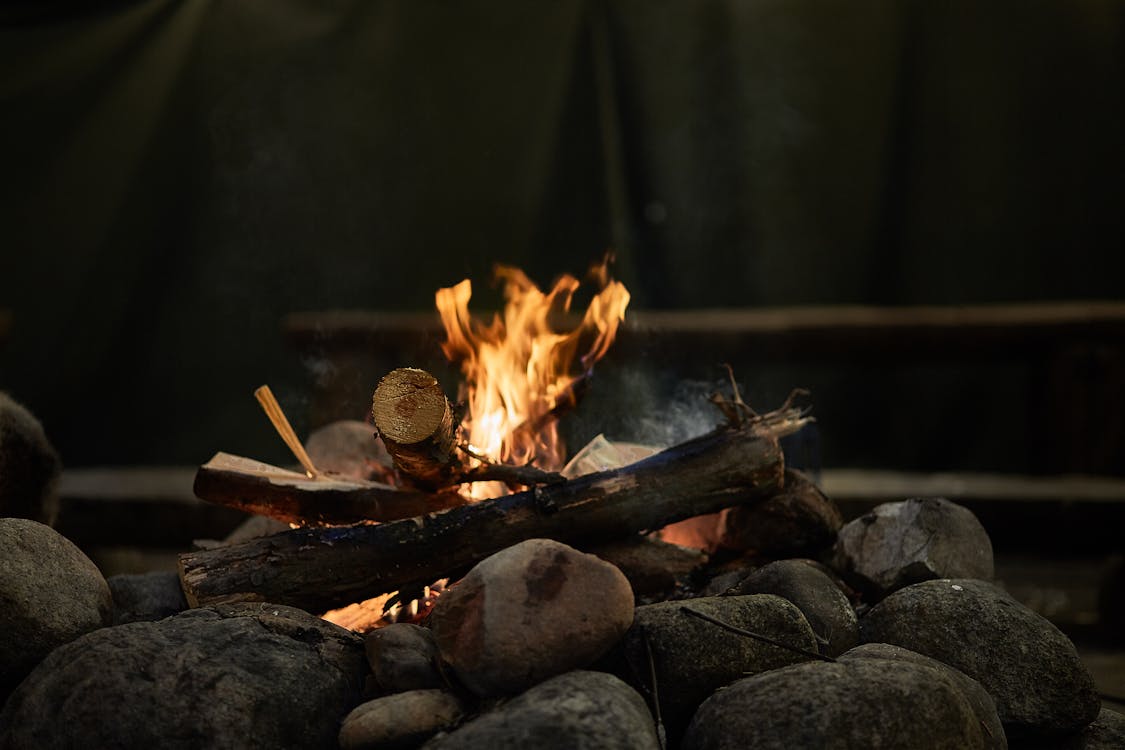
If you recall, fire is one of the four key components of survival, because of that, having a combustion device to start a fire in your survival kit is a must. It is no wonder that combustion and combustion devices are considered as one of the 5C’s of survival.
Fire has multiple uses in the wilderness, it can be used to cook food, sterilize drinking water, provide warmth, dry clothes, and ward off predators. It can even be used as a method of communication and also to signal for a rescue.
The fire is not the only thing that’s useful, the ash made by the fire can be made into a kind of soap. It’s smoke can also mask your body odor and help you blend in with your surroundings. When you clothes collect a smoky smell, it will also help deter insects.
In general, fire is one of the key components of survival because of it’s plethora of benefits that’ll help you survive. Because of that, you’ll need to have top notch combustion tools and a great firewood to start your campfire.
Matches and Lighters
There are a lot of combustion devices available today and each has their pros and cons. One of the easiest and most basic way of starting a fire is using a lighter or a match.
However, matches and lighters are not the most reliable or durable fire-starting kit you can carry. They can easily break when dropped or stop working entirely when wet. Lighters can also run out of fuel quickly if used a lot and most of them can’t even operate well in extreme temperatures and high elevation.
Despite all of these drawbacks, lighters and matches are a great addition to any survival kit because of their ease-of-use and general cheapness.
There are several expensive survival lighters on the market that promise lots of benefits, extra features, and extreme reliability. However, they tend to have mixed results and not all of them can deliver on their lofty promises. Personally, I just use a plain BIC lighter and a Zippo. They’re pretty cheap, reliable, and has decent durability, perfect for any survival kit.
For matches, avoid the cheap matchbook style matches as they’re flimsy and unreliable when exposed to the elements. I prefer stormproof matches that are enclosed inside a waterproof casing. They’re durable, heavy duty, and will still work perfectly when wet, some can even burn underwater!
However, stormproof matches aren’t usually strike anywhere, they need a specialized striking surface to light up. Because of this, having a wooden strike anywhere match to complement your stormproof match is a good idea. Just remember to keep these in a small waterproof container and wrap them in a rubber band to prevent them from rubbing with each other.
Overall, matches and lighters are excellent for starting fires, however, they come in limited supply. You’ll quickly burh through them if they’re your only fire-starting method. For more durable and longer lasting fire-starting methods, look below!
Firesteel and Magnesium Rods

Ferrocerium rods or firesteel is another popular fire-starting choice among bushcraft and survival enthusiasts. It’s basically a ferro-steel rod that produces sparks when struck with another rod.
Firesteel is a great fire-starting choice due to it’s reliability and effectiveness. It can create hot sparks anywhere, even in extreme conditions. They also don’t break easily and can be used multiple times as long as the rod is still intact. They can even create sparks while being wet, although we recommend drying it first so that it produces the best and hottest sparks.
Keep in mind that firesteel only produces sparks, not flames. You’ll need a good quality dry tinder to ignite with this firesteel to create a flame.
High quality ferro-steel rods can throw sparks of up to 3,000 degrees Fahrenheit or about 1,650 Celsius. You’ll need something strong to grind the firesteel to get the best result. You can use the back of your knife if it has a square edge to shave off ferro-steel rods. However, you can’t use the front of the blade because of it’s sharp rounded edge.
Most firesteel comes with a small scraper attached so that you don’t have to worry about the suitability of your blade. Because of that, try to find a firesteel with a scraper attached. All in all, a high-quality firesteel is probably one of the best and most well-rounded Combustion tool available for a survivalist.
A magnesium stick is basically a firesteel with a block of magnesium attached to it. The magnesium is then shaved into a small pile with a knife or scraper and is then ignited with sparks from the firesteel. The magnesium shavings will burn extremely hot (over 4.000 F) but it will only last for a few seconds. Because of that, you’ll have to set up a good amount of kindling first to take advantage of the hot sparks and flame.
If you want an easier way to light up your kindling, having a magnesium stick will be more helpful compared to simply having a firesteel.
However, you need to keep in mind that shaving the magnesium block can be time consuming if you’re not used to it. Besides that, you’ll also have to guard the shaving pile so it doesn’t get blown by a particularly strong wind. However, if you manage to gather a decent amount of tinder and a pile of magnesium shaving, one spark can guarantee a warm fire for the day.
All in all, a magnesium stick can help you create fire even when there’s no good option for starter kindling. With this, you’ll be able to create warm fire anywhere anytime.
Fire Pistons
Another great albeit unconventional fire-starting option would be a fire piston or sometimes called a fire pump. This works by quickly compressing air so that the air increases in temperature. The air gets so hot that it will be able to ignite small pieces of kindling or tinder you place inside of it.
Most fire pistons will be able to reach temperatures of over 400 F which will instantaneously combust most tinder. If you use a fire piston with a clear see-through body, you’ll be able to see this in action!
The reliability of a fire piston highly depends on the tinder and kindling that you place inside of it. If you use a dry tinder or a charcloth, they might instantly ignite on the first press. However, if you use a wet tinder or one that’s too big or moist, you’ll likely need a lot more presses before they finally ignite.
Using a fire piston also highly depends on the quality of the device. If you maintain your fire piston well, it will be easier to ignite tinder due to less leaks and a smoother sliding mechanism. Besides, a fire piston also relies on a well maintained and lubricated O-ring to seal and slide the pump correctly. If you don’t maintain it, most likely you won’t be able to ignite anything due to a leaky fire piston.
While finnicky, the fire piston can be used an infinite amount of times, it doesn’t have any resource that it consumes after every use (except your energy).
All in all, fire pistons are definitely not the most reliable combustion device, for that, get a magnesium stick or a stormproof match. However, if you need a back-up fire starter that’s able to last a long time and doesn’t need to be reloaded, a fire piston is a good choice.
Magnifying Glass and Parabolic Lens

Besides methods that create sparks outlined above, you can also harness the power of sunlight to heat tinder and create a fire. Magnifying glasses and a parabolic lens works perfectly for this. Both of them works on the principle of focusing sunlight into a single point.
Surely you’ve heard about children using magnifying glasses to melt plastic toys right? This works on the same principle, you’ll focus the heat of the sun not to melt toys but to ignite tinder. You’ll just need to find the perfect angle and perfect direction to capture the most amount of sunlight and concentrate it into a single point.
If you don’t have a magnifying glass, you can improvise using everyday items. Eyeglasses and empty glass bottles can sometimes be used to focus light like a magnifying glass. You can also use a camera lens although we won’t recommend that as it’s pretty expensive compared to simply buying a magnifying glass.
You can even fill a plastic bag with water and it’ll act as a makeshift magnifying glass. However, it all depends on the angle and the type of glass/bag that you use, some can mimic the focusing powers of a magnifying glass and some cant.
If you’re looking to buy a magnifying glass for your EDC kit, be it for it’s magnifying properties or to start a fire, we would recommend this small lens that you can throw into your kit. It’s small, it’s cheap, and best of all, it’s multifunctional.
Parabolic lens works on a similar principle as a magnifying glass, however, with this lens, sunlight is focused by reflection instead of refraction.
In general, a parabolic lens is not something you would pick up and stash in your survival kit or EDC pack due to it’s niche usage. However, it’s still a good idea to have one if you don’t have a magnifying glass. If you desperately need one, you can improvise using lightbulb sockets lined with tin foil/mylar, car headlamps, folded tin foil, and even the insides of an aluminum soda can.
Generally, any form of inwardly curved surface that’s reflective could be used as a parabolic lens. The performance of the lens depends on the smoothness and reflectiveness of the surface. A cleaner surface will also reflect sunlight better so try to clean it with a cloth before usage.
Magnifying glasses and parabolic lenses both require clear direct sunlight and the perfect angle to create enough heat to ignite tinder. On cloudy days or in heavily canopied forests where sunlight can’t get through, it can be hard to use these methods.
However, like the fire piston, a magnifying glass and a parabolic lens can be used infinitely without consuming anything. You just need to make sure there is a sufficient amount of sunlight coming your way.
Friction Fire
Fire is one of the 4 key factors of survival and combustion tools to create them is considered to be one of the 5C’s of survival. It’s no surprise that our ancestors have already thought of techniques to create fire anywhere and anytime they need it.
Friction fire is one of those ‘old’ fire starting techniques, a relic of an older age where technology didn’t exist, but is unsurprisingly still useful due to how basic it is. If you’re familiar with friction fire and it’s associated techniques, you’ll be able to create fire almost anywhere.
There are quite a few different techniques for creating a friction fire, several of the most popular techniques are the bow drill, hand drill, fire plow, and fire saw.
Theoretically, the concept of friction fire is very simple. You simply rub a hardwood and a softwood repeatedly so the softwood grinds into a pile of fine dust. The rubbing process creates friction which in turn will create heat. As you keep rubbing, the heat gets hotter and hotter until the pile of dust ignites into small embers which can then be placed into a pile of kindling to start a fire.
After that, it’s simply a game of how you could guard the small fire and also grow the fire. The most logical strategy would be blowing the pile of kindling and tinder while slowly adding dry hardwood on top. We would recommend you switch to fanning the flames after it gets big enough so that you don’t get tired from all that blowing.
When creating a friction fire, you need to make sure the wood is completely dry. You can still try to use damp wood but it’ll take a very long time, it might not even create any ember due to the moisture present in the wood.
Creating a friction fire in the wild requires a lot of trial and practice to master. This is generally one of the hardest ways to start a fire due to it’s energy consumption and the amount of technical knowledge needed.
Besides that, creating a friction fire also heavily depends on the climate and environment around you. It is relatively easier to start a friction fire in a dry desert compared to a moist tundra. On the other hand, it might be easier to start friction fire in a tundra compared to the wet environment of a tropical rainforest.
All in all, friction fire is one of the hardest fire starting methods there is. However, this is a skill you still need to learn because during survival situations, you might not bring all of your gear with you. Knowing how to start a fire with nothing but 2 pieces of wood is very important.
Other Fire-starting Methods
There are a lot of fire-starting methods that can be used to start a fire. Batteries can be used to start fire by attaching the positive and negative terminals with a metal wire. This should heat the wire enough for it to ignite the tinder and create a base for your fire. However, this is a relatively dangerous technique because batteries can explode if their terminals are connected like this for a long time.
If you have a vehicle nearby, car batteries can throw sparks if the connecting wire is tapped on the terminal. This spark functions like a fire-steel and can light up your tinder.
All in all, batteries are a decent fire-starting device if you’re near your vehicle. However, they are not suitable as a portable fire-starting device or to store inside your survival kit.
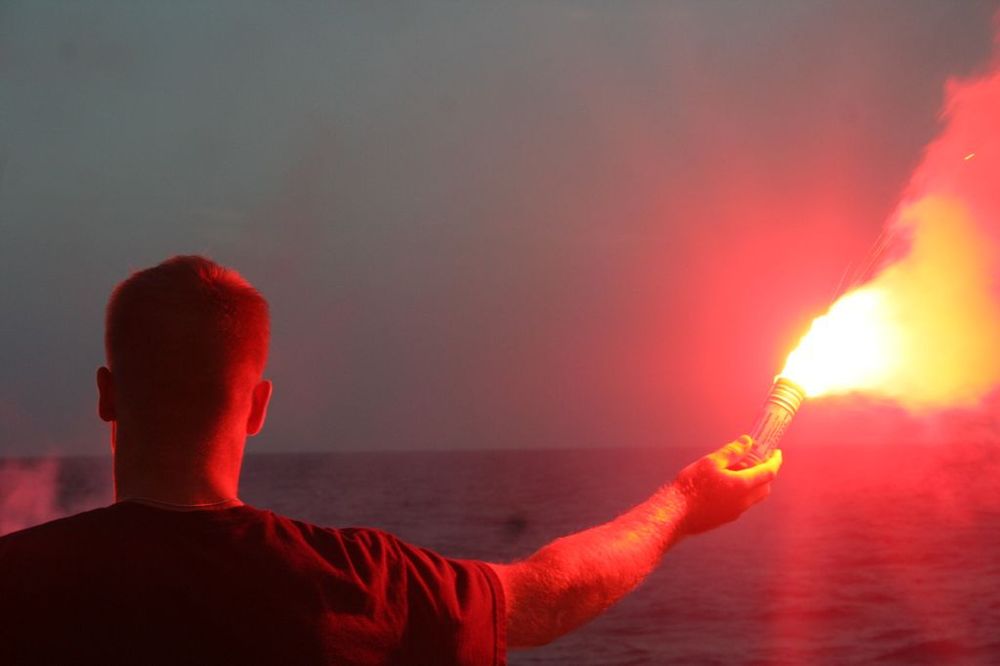
Most flares can also be used to start a fire. However, you’re wasting precious rescue and signaling equipment by using your flare to create a fire. You’re better off using the methods outlined above to create fire compared to using your flares.
In general, it’s a good idea to practice various methods of fire-starting and to include several combustion tools in your EDC kit. Personally, I carry a firesteel and a couple of regular and stormproof matches inside a Ziploc bag whenever I go out camping. I feel that this combination allows me to start fire in almost all conditions and is not too heavy to carry inside a backpack.
Pre Made Tinder
Besides combustion and fire-starting tools, you might also want to include some tinder in your survival and EDC kit. Good quality tinder is often hard to find out in the wild, especially if you operate in wet areas where there is a lot of rainfall and moisture.
Carrying a pre-made tinder is a great idea to kickstart your fire so that you don’t have to look too hard for natural tinder. Most pre-made tinder takes up little space and is virtually weightless, because of that, you won’t really know it’s there until you need to use it.
There are a lot of options for ready-made tinder on the market from cotton balls to shaved wood, heck you could even use paracord for tinder if pressed. Personally, I find basic cotton balls work pretty well, if you soak them up in vaseline or any other form of wax, it gets even better.
You can simply throw those cotton balls inside a plastic ziploc bag and squeeze the air out. It will be very small and light inside your backpack.
When you need it, simply open the Ziploc bag, break apart the clumped cotton balls, and fluff up the fibers to create some high quality tinder that’s quick to light. If you want a good quality pre-made cotton tinder that’s also quite cheap, check this out from 5col Survival Suply.
Charcloth Tinder
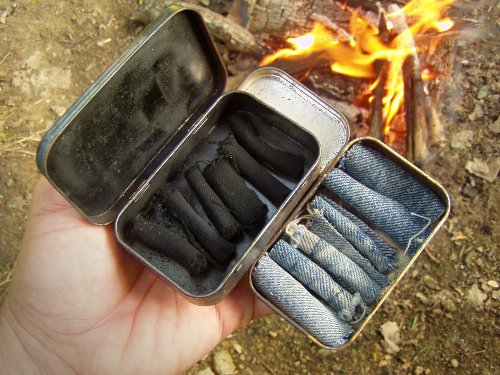
Another good choice for tinder is charcloth, this is basically cloth or any other fabric but charred. Making this requires you to already have a good campfire going so it’s good to make a lot of these so it can be preserved for future outdoor trips.
Creating charcloth is very simple, gather some flammable fabric such as a cotton fabric from your shirt or bandana and put it inside a container. If you don’t have any fabric, you can also use natural fibers as we’ve discussed in the cordage part above. However, fabric, especially cotton fabric usually yields the best results due to it’s uniform and tight weave.
After you’ve put the fabric inside a container, like a metal canteen or a metal matchbox, you then close the container tightly but leave out a small gap so that a little bit of smoke can come out. After that, place it inside your campfire, or any other fire that’s large enough. After a while, smoke will begin to come out via the small hole, this is when you know your charcloth is going through a thermal decomposition.
This very small hole or gap allows smoke to come out but will hinder air from coming in. The lack of oxygen will hinder the cloth from burning up completely, turning it into a sort of charcoal.
Once the smoking stops, you then remove the container from the fire and allow it to cool for a while. When opening the container, you’ll be greeted with a well charred carbonized cloth which is why it’s called charcloth. It will easily catch fire and is very helpful in starting a campfire when you lack tinder.
Charcloth is very similar to charcoal and is highly flammable with low ignition point, few sparks from a ferro-steel will probably light this up, as long as it’s dry. However, you need to remember that charcloth needs to be combined with kindling to create a base for a campfire.
This is a very easy to make tinder, provided you have the right materials and enough time. It’s a great addition to any survival kit and one you can readily make at home.
However, keep in mind that charcloth is quite messy and will leave black soot on every surface it touches. Besides that, charcloth is also very sensitive to moisture, if it’s wet, it won’t light and will just be a regular soggy fabric. If you want to carry charcloth, make sure that you have a waterproof sealed container.
Container
Having a lot of gear is good, but what’s the use if you can’t carry all of it when you’re out in the outdoors? Because of that, having a good container is considered as one of the 5C’s of survival. Having a suitable container is extremely useful to have in the wilderness.
Containers is a very broad spectrum. A backpack can be considered as a container, a bowl, a medicine bottle, a canteen, and resealable bags are also types of containers. Each type of container has different uses, based on their properties and characteristics.
However, they all share the same characteristic, they all help you carry your survival gear and keeps them in optimum condition.
Water Container
One of the most important uses for a container for you in the wilderness would be to hold sterilized drinking water and to store food. As we know, water and food is part of the four key components and survival and we humans can’t survive without them.
Most of the water you’ll find in the wilderness will often contain various forms of pathogens such as bacteria, parasites, and viruses. These can cause illnesses ranging from a regular diarrhea to poisoning or even death. Because of that, its always better to boil water and filter them first to get rid of the pathogens before drinking it.
After boiling and filtering, you’ll also need a container that’s capable of holding it and preventing outside germs to contaminate it.
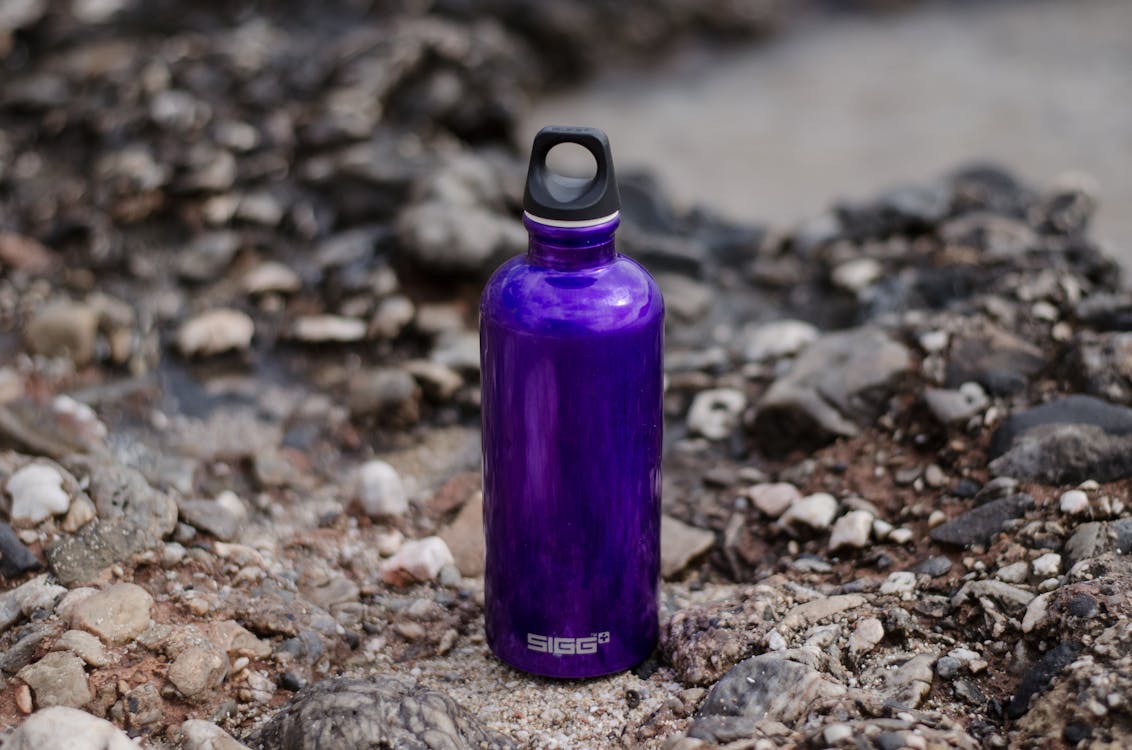
A stainless steel canteen is ideal for this because it can be used to boil water when placed directly on top of a campfire. It can also store that water after you’ve done boiling it, so it basically does two functions that will allow you to have a relatively safe drinking water anywhere.
When pulling the metal canteen off of the fire after boiling, it can be scorching hot and might burn your hands. Because of that, you should use a multitool or a plier to grab the canteen. You can also use wooden sticks to nudge the canteen off of the fire.
If you don’t have a metal canteen, a wooden or even plastic container can also be used to sterilize drinking water by pasteurizing it. You can do this by setting the container near the fire but not directly on the fire. The radiant heat from the campfire will slowly heat the water to pasteurize it, but not enough to melt or burn the container. To pasteurize water, you’ll need to bring it to 60 degrees Celsius for about 30 minutes.
Keep in mind if you sterilize your drinking water in a container that’s different than the one you gathered it in, don’t pour your sterilized water into the original container. There could still be residual pathogens inside the original container you used to gather water!
Food Container

Besides storing water, a container is also highly useful for cooking and storing food. The most efficient way to preserve calories, nutrients, and all the juices when cooking is by boiling it in water. Roasting, frying, and other methods of cooking might make the food taste better but you’ll lose out on nutrients due to burning and heat degradation.
If you’re a hunter and you’ve processed your catch, you can also boil the carcass of that animal to make broth. Broths are an excellent way to squeeze every last ounce of nutrient from an animal in the wilderness.
As we’ve said before, boiling and creating stews are one of the best ways to cook in the wilderness. To do this, you’ll need a container that allows you to boil food. Most survivalists would point you to a large sealable pot or a large metal canteen, just like the one you use to hold water.
These tools can be used to both store unprocessed food, boil and cook the food, and then after being cleaned, store the cooked food for later use.
If you plan on smoking your food to preserve it, you could also bring ziploc resealable bags or mylar bags to store your smoked food. Having these will allow you to stretch your food rations far longer compared to simply eating everything on the spot.
Other Containers
Aside from water and food containers, you’ll also need other forms of container to store your belongings when out in the wilderness. Having a great quality backpack is a must so that you can carry all of your belongings easily and without too much fuss.
If you’re the type to carry lots of gear, you might also need to wear a fanny pack so that you can store smaller tools there.
Packaging items such as plastic bags, resealable Ziploc bags, and vacuum sealed Tupperware-style storage is also very important. Without these, you won’t be able to conveniently store your gear inside your backpack. These items will also help you organize your things and to prevent them from mixing together. This is important if you bring gunpowder or fuels along with food on your backpack.
Having a good quality container will also help shield your things from outside elements that may damage them. Weather proof containers for example will be very useful if you’re operating in an area where it frequently rains.
Plastic Ziploc resealable bags are a personal favorite of mine. I often put my maps, food, electronic gear, clothes, and most of my gear inside large resealable bags. This is useful to prevent water from leaking in and damaging them, especially because I like to ford rivers a lot during my outdoor trips.
Improvising Containers
If you didn’t bring lots of container during an outdoor trip, you’ll be delighted to know that you can improvise containers from everyday materials and even materials found in the wild.
You can improvise a backpack by laying a sheet or tarp flat and putting your items in the middle of that sheet. You can then roll the sheets and then tie the ends using paracord or any other cordage you have. You’ll have a makeshift waterproof backpack to store items. If you have enough cordage, you can even improvise a strap so that you can carry it like a regular backpack.
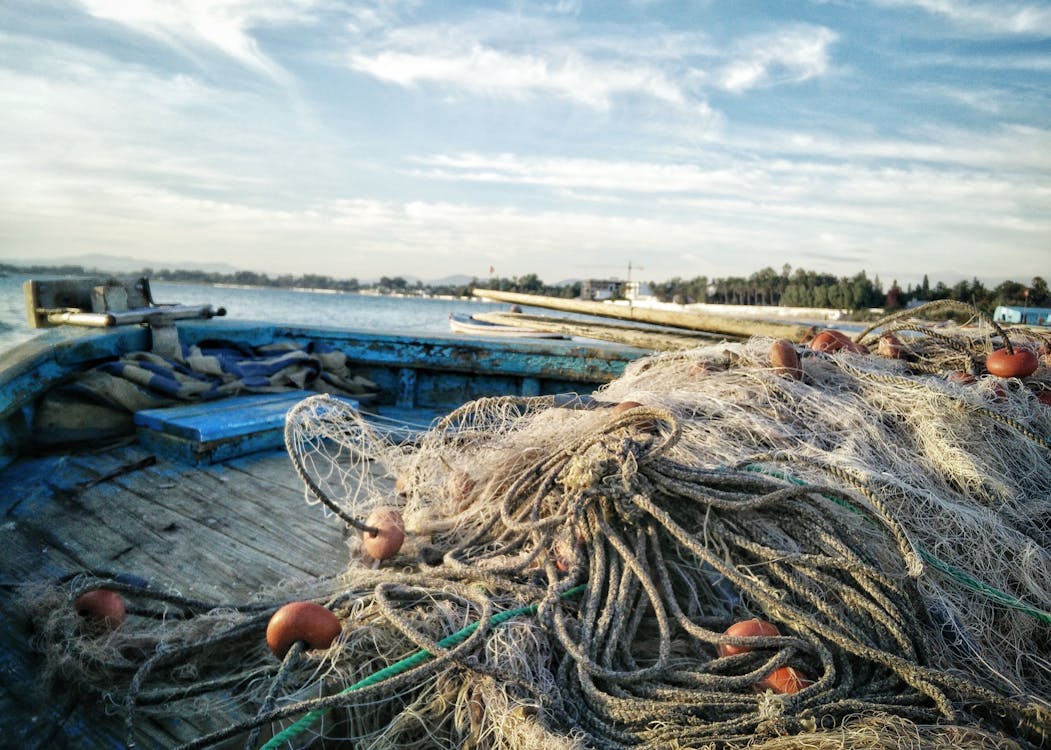
This improvised backpack can also be created using fishing nets or even from cordage. You could tie together paracord or duct tape to create a mesh like structure to store your things like a regular rucksack.
Plants can also be improvised into containers. Large bamboo and some other plants have segments that can be cut and used as a container. Large wooden logs can be carved out to make containers such as a drinking cup or a water canteen.
Animal organs can also be used to create containers. Animal bladders can be fashioned into water pouches or any other pouch depending on it’s size and your creativity. It’s skin can be stitched together to create a backpack or a pouch.
All in all, survival is all about improvising and being creative with what you have and with what’s around you. Because of that, knowledge and adaptability is very important.
Cover
Cover is also an often forgotten but important component of the 5C’s of survival. Cover basically means shelter and as you all know, shelter is part of the four key components of survival. Because of that, this is an important thing to have and be aware of when you’re out in the wild.
Cover includes anything that protects you from the elements be it rain, wind, or sun. These can include tarps, tents, flysheets, and even your clothes and jacket. You can even include poncho, hats, sunglasses, blankets, and sleeping bags into the cover category.
All in all, everything that protects you from external elements is considered as cover. Because of that, cover is a very broad topic and we’ll try to delve into it so you can get a better picture.
Environmental Risks and the Importance of Cover
Did you know that hypothermia is one of the largest causes of death in the outdoors. Its a bigger risk compared to animal attacks, starvation, and dehydration.
Hypothermia is caused by prolonged exposure to cold and wet environments. Because of that, cover is very important to reduce your exposure to extremely cold and wet environments. Cover can also reduce the intensity of the cold weather and to insulate your skin from the wet moist environment.
You are more likely to become hypothermic if you or your clothing gets wet. This is because water draws away body heat far faster compared to ambient air. Even in moderate temperatures of 15 Celsius, you can get hypothermia if your clothing is sopping wet.
This is the reason why waterproof clothing and rain gear is very important for any outdoor activity. A simple $1 throw-away plastic poncho can literally save you if it suddenly rains and there’s no cover. However, a high quality waterproof EDC jacket is surely better.
When buying rain gear, check whether it is water-resistant or water proof, there is a big difference! Water resistant gear will ‘resist’ water and might let water soak in if it gets really wet. Because of that if you live in an area that has intense rainfall, it will be better to bring a less-breathable but water-proof clothing.
In the desert or in tropical areas, you’ll likely have the opposite problem. The sun can be very dangerous if faced without preparation, it can cause sunburn, dehydration, and heatstroke or hyperthermia. Hyperthermia is a condition where your body overheats and fails due to failure in regulating temperature.
Because of that, during periods of high heat, it can be very beneficial for you to keep your body shaded either with clothing or shelter. You should not walk around in the open without proper clothing and maybe a hat if the temperature is hot and the sunlight is intense.
This is one of the reasons why people in the middle east wear full body clothing made out of loose breathable fabric. It helps shelter them from the intense sunlight and hot temperatures.
When travelling in the desert, it is recommended to travel at night or in the afternoon where it’s cooler. During the day, you should always relax in the shade to reduce chances of hyperthermia and heat stroke. If there is no shade, you can lay a tarp to create temporary makeshift shelter.
However, keep in mind that blazing hot deserts can become freezing cold at night. Because of that, you’ll have to plan ahead by bringing various clothing, based on where you are going to go. You’ll also need to have a good shelter in place to protect yourself and your group when you sleep during the night.
Clothing as Cover
The clothes you wear is one of the most important forms of cover that you can have. It will protect your skin from sharp objects and will insulate it from external elements.
Clothing comes in many forms and shapes, they’re made with certain materials depending on it’s function and purpose. These are common clothing materials and their recommended usage, check if your clothes materials match our list
- Cotton is one of the most widespread material for clothing. However, it’s not recommended for wet environments because it loses its insulative property when wet. However, cotton can be quite warm and comfortable when completely dry. Because of that, it might be good as a summer shirt material or as an undershirt for layering.
- Fleece is a form of polyester that is frequently used as a cold weather material for jackets and vests. It is very warm and insulating and keeps decent insulative value even when wet. Fleece is also and it is very easy to dry out when wet but it’s quite bulky. Fleece is a good choice for medium-cold temperature environments but not for temperatures below freezing.
- Wool is often recommended for very cold, below-freezing environments. This is because wool is very warm and has stellar insulative properties. However, it’s heavy, bulky, and can be itchy on the skin depending on the wool type. Great quality wool is also quite expensive, such as the Merino wool. Because of that, wool has seen fierce competition from down and synthetic materials as a cold-weather staple.
- Down feather is a material that’s usually used for jackets designed for extremely cold temperatures. Down is extremely warm, lightweight, and highly compressible for packing. However, down loses almost all of it’s insulative value when wet and is difficult and time-consuming to dry out. Because of that, most down jacket is waterproof and the down is lined using waterproof materials. Down gear is great for extremely cold environments. However, down is generally very expensive, especially non-synthetic down.
Those are only some of the materials that are frequently used for clothing. There are also synthetic materials that has specially engineered properties specific to their function such as waterproofing or insulation.
Do your own research into what clothing material you should pick out based on where you live and where you’re going. Make sure that it matches the environment so it can cover for your body and insulate it from the elements. Usually, one of the best ways to analyze what you should wear is by finding out what the locals wear and imitating them.
In cold environments, you should always dress in layers. This ensures that you can quickly respond to the changing temperature, be it warmer or colder. As you start to feel hot, you can remove the outermost layer. If you start feeling cold, you can add on more layers to further insulate your body..
The general rule of clothing is that it’s better to have more clothing than you need, because you can discard it compared to having too little.
You should also look for more specialized forms of clothing such as a parka for cold weather situations. In warmer wet-weather, you can also use a poncho instead of a thick waterproof jacket.
Tarp as Cover
Now that you’ve got a decent idea about clothing, you should also have a good shelter. What I usually use for shelter is a good waterproof tarp. This will enable you to create a decent shelter when camping out in the woods or during survival situations. A good tarp will block rain, sun, and if you angle it correctly, wind.
There are many different structures that you can create with a medium sized tarp. You can make a lean-to shelter, an A-frame, or a tipi/teepee style shelter. The type of shelter that you can build also depends on the size and thickness of your tarp.
I personally use a 10×12 feet or 3×4 meter medium duty (5mm thickness) tarp. It’s big enough for you to create a lot of structures easily and it is also big enough so that you won’t feel cramped. Heavy duty tarp is also good, however I feel that they’re just too bulky to comfortably store in my backpack.
When creating a shelter with a tarp, it’s important for you to have the appropriate cordage to tie it all up. Because of that you also have to think about the other 5C’s of survival which is cordage. I personally use a paracord and sometimes a plastic rope to tie my tarps.
Waterproof tarps can also leak water, especially during heavy rain and if the tarp is not waxed enough. The shallower the angle of your tarp roof, the more likely it is for water to drip through. You should also avoid touching the underside of a tarp during rain, especially if there is a water-bulge. This can actually pull the water through and make it leak inside.
Some people prefer using tents instead of tarps. I agree that they have a lot of advantages going for them, they don’t need trees to set up, they can be more practical, and sometimes it’s more comfortable. However, I personally like to use tarps more compared to tents because they’re cheaper. You’ll also feel more connected to nature when using a tarp compared to a tent.
Besides, you can also create a campfire inside a tarp to add more warmth, especially if you camp in cold weather or during the rain.
And best of all, a tarp can be a part of your emergency survival gear or EDC gear. You can carry it anywhere and be prepared for anything. Tents are bigger and at times more of a hassle to carry compared to a properly folded sheet of tarp.
Other Forms of Cover

As we’ve said before, this 5C of survival covers a lot of things. Besides clothes and shelter, you can also count bandanas, hats, and sleep-wear as covers too.
A bandana is another simple but very multifunctional piece of cover. It can be used to hold your hair back, keep bugs out, used to cover your face and mouth, or as a sweat guard. You can also dip it in water and use it to cool down during a particularly hot day.
Bandanas can also be used for first aid purposes. They can be used as a first aid bandage or to wrap your wounds as an emergency response during evacuation. Heck you can even use bandanas to create charcloth as we’ve discussed in the combustion part of this article.
All in all, bandannas are very cheap, lightweight and multipurpose. Because of that, it won’t hurt to carry one or two inside your survival pack.
Sleepwear is also something you should think about. If you plan to go to a cold area, it’s a good idea for you to bring cold weather sleeping gear such as a warm sleeping bag and some sleeping bag liners. It will help you sleep in the freezing cold and to prevent yourself from getting hypothermia.
If you’re the type to relax or to pack ultra-light, you might also want to take a look at a hammock. There are several types of hammock such as the regular ones or the ones with a spreader bar.
Improvised Cover
You can also find natural materials in the wild that acts as great shelters. Large banana leaves, birch bark, and bamboo can be used to create waterproof roofing. You can also stack lots of leaves and branches to create a pseudo-waterproof roof for your makeshift shelter.
Materials that can be used for ‘cover’ can also come from unlikely places. Even large garbage bags can be improvised into a form of waterproof clothing. You can simply cut holes into them and turn it into a makeshift poncho. They can also be cut into sheets to make a waterproof lining for your shelter.
Garbage bags have a lot of uses for outdoorsman and survivalists. Because of that it’s a great idea to bring a few during your camping trip and inside your EDC pack.
In general, cover is probably the broadest category of the five C’s of survival and can include many different things. However, its important to remember the core concepts, your body needs to be sheltered from the elements. Anything that provides this shelter is considered as cover and is essential for your survival. Because of that, cover is considered as one of the 5C’s of survival.
Final Take
Besides the five C’s of survival discussed in detail above, one of the most important aspects of surviving anything is having the correct survival knowledge and mindset. Without proper knowledge and mindset, having all the gear in the world would be useless.
You’ll also have to consider the four components of survival briefly discussed above. Without those four components, it would be very hard for humans to survive anywhere. Because of that, the 5C’s of survival should be used to guard or acquire the four components of survival.
Hopefully this article is able to shed some light on the five most important components of surviving which is usually known as the 5C’s of survival.
However, knowing about the five C’s of survival and being able to apply it in the field correctly is two different things. You need to try the methods outlined above to get a feel of how it will work on the field. Remember the old saying, practice makes perfect!
Great content! Keep up the good work!